During the classes "Design and Manufacturing" (ME203) I learned about connections, machinable operations in lathe and mill, and some basics about scaled manufacturing process like injection molding, sand and die casting and metal forming. During this class, as a project we needed to create a design which should be machinable, and then do all necessary modifications to adapt it to scaled manufacturing. This class was took during the COVID-19 pandemic, reason for which the design never were manufactured, but some prototypes were built.
Preliminary Design
I got some inspiration of existing meatball makers, adapting it to create meatballs with the shape of a bunny head.
The meatball maker should be easy to use, should create robust meatballs that will not fall apart, and the meatball should be easily removed from the tool.
Prototypes
Prototypes where build in order to answer different design questions
1. How will look a bunny meatball?
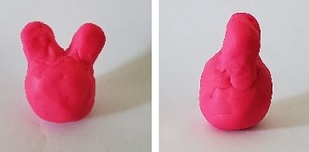
The first prototype was made of Play-Doh and it was made to get an idea how this meatball will look and possible dimensions.
I concluded that depending on the person, this could look like a bunny or upside-down pants. So, I would recommend decorate the meatball with eyes once is done.
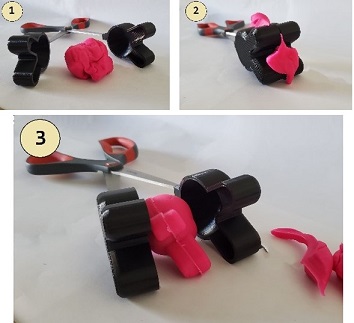
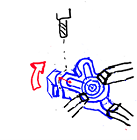
2. Will the bunny ears be a problem when removing the meat from the tool?
One concern was that the ears will break when removing the meat from the tool. A first experiment was performed using a carboard prototype attached to scissors and Play-Doh. We can consider Play-Doh as a conservative result since meat resists less than Play-Doh
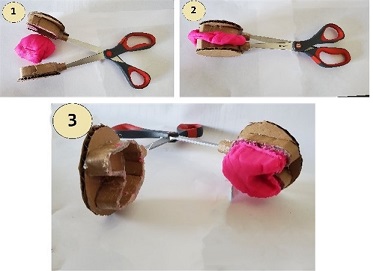
In this prototype the ears were not a problem. But a new problem appeared: the meatball could get stuck to the mold part.
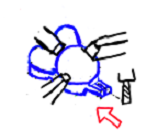
To get a better idea, a new prototype, more rounded and smoother was 3D printed.
Takeaways functional prototype:
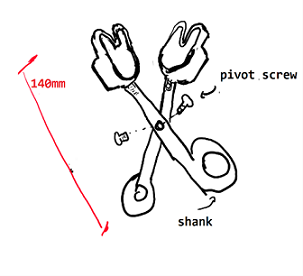
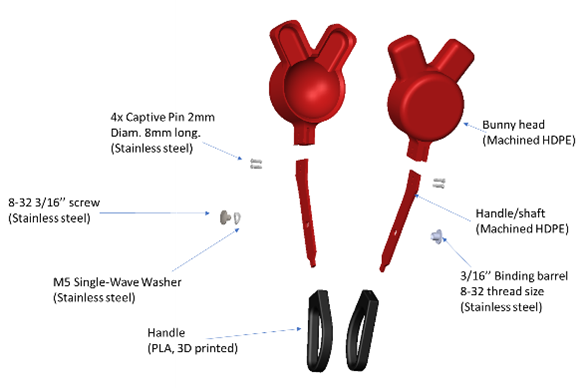
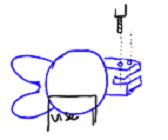
- In the preliminary design, the union of the head-mold with the shank was through threaded parts. When building the prototype, I thought would be easier to use set screws.
- After closing the tool, the meat continued attached to the mold. A chamfer in the edge of the mold was added to cut the excess of meat.
- When using real meat, after 3 repetitions, the meat got stuck in the mold. The final version should be smooth as possible. Also, I considered design changes that could help to remove the meat when the meat is stuck, for example including a hole in the back.
- I used the head-mold CAD to get an idea of its weight using different materials. Stainless steel was 261gr, aluminum 88gr and Delrin 46gr. Considering that this is only a part of the tool, I will use HDPE as material.
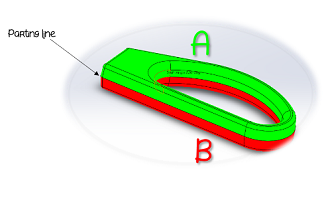
Machinable Design
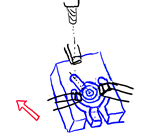
The critical part of the design was the head-mold. Some details in the design were defined by the machining capabilities more than following a sleekly design. For example, the back of the mold is flat instead of convex and the external shape of the bunny ears has the radius considering using the rotatory table centered in the concave part.
The head-mold can be manufactured in a mill with a rotatory table. To make easier locate different features to machine, the rotatory table and milling machine was zero-out in the center of the semi-sphere.
Given the complexity of the piece, there 16 machining steps. The most important steps are:
Redesign for Scaled Manufacturing
The scaled manufacturing version of the meatball maker will be made of die casted aluminum and chrome plated. This process brings several benefits to the design: Tinner walls allow the use of better materials without increasing considerably the weight, smoother surfaces without the need of postprocessing, a food safe surface, and a sleekly design.
The head-mold and the shaft were fused to one piece. The head-mold had 1mm wall thickness, and 5° draft in the ears. The shaft was 1.5mm thickness with 1° draft.
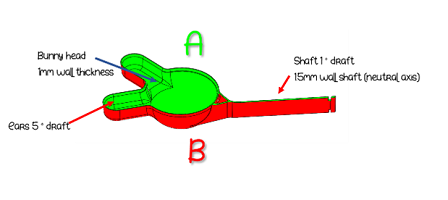
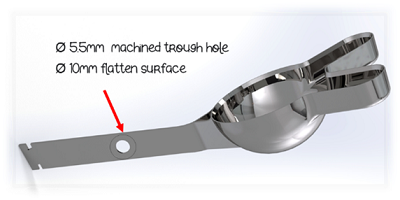
Once fabricated, a 5.5mm through hole was machined, and the surface around this hole was flattened to ensure the rotation surface was perpendicular to its rotation axis.

The handle will be of ABS insert molded.